
DIY Leprechaun Hat Craft for Kids 🍀
- Mar 17
- 4 min read

A fun St Patrick’s Day craft you can make at home
If you're celebrating St Patrick’s Day or planning a themed party, this DIY Leprechaun Hat craft is a fun activity to try with the kids.
Made using simple materials like coloured card, scissors and glue, this craft creates a wearable leprechaun hat that’s perfect for dress-up, parties, school celebrations or festive photos.
The best part is that you can measure the hat to fit your child’s head, so it’s comfortable to wear while they hunt for pots of gold or pretend to be mischievous leprechauns.
Let’s get started!
What You Will Need
Measuring tape
4 × A4 green card
2 × 12 × 12 pieces of green card (or two A4 sheets glued together)
1 × A3 black card (or two A4 sheets glued together)
1 × A4 yellow card
Double-sided tape or glue
Scissors
Pencil
Compass (optional)

Step-by-Step Instructions For Your
1. Measure Your Child’s Head
Use a measuring tape to measure around your child’s head.
Add 1 cm to this measurement so the hat fits comfortably.
Example:If your child’s head measures 53 cm, add 1 cm so the final measurement is 54 cm.

2. Create the Hat Cylinder
Cut a piece of green card that is:
13 cm high ( 5 inch ) × your child’s head measurement + 3 cm ( 1 inch )
Example: Leo's head measured 53 cm (21 inch), I need to add 3 cm to this so my card would need to be:
13 cm (5 inch ) × 56 cm (21 inch )
If your card isn’t long enough, simply glue two pieces of card together.

3. Make the Tabs
Draw a line 1 inch from the top of the card.
Draw another line 1 inch from the bottom of the card.
Fold or score along both lines to create tabs.

On one of the tabs, cut triangle-shaped teeth along the edge.

4. Form the Hat Shape
Place glue or double-sided tape on one short edge of the card.
Attach the other short edge to create a cylinder shape.
The triangle teeth should be at the top of the cylinder.
Fold the triangle teeth inwards.

5. Create the Top of the Hat
Place the cylinder on top of another piece of green card and draw around it.
(If you want to be more precise, measure the diameter of the cylinder, divide it in half to find the radius, and use a compass to draw the circle.)
Cut out the circle.
Place the circle onto another piece of green card, draw around it and cut out a second identical circle.

6. Fit the Inside Circle
Check if one of the circles fits inside the cylinder.
If it’s slightly too large, trim it until it fits snugly.
This circle will form the inside top of the hat.
Add glue or double-sided tape around the edge and middle of this circle.
Place it inside the hat and push it up until it touches the folded triangle teeth.

7. Attach the Top
Add glue or double-sided tape to the second circle.
Turn the cylinder upside down and press it onto the glued circle.
The two circles will stick together, sealing the top of the hat.

8. Create the Hat Brim
On the tab at the botton of the cylinder, cut straight slits along the edge to create small tabs and fold them outwards

Take one of your 12 × 12 green card sheets.
Place the hat in the centre and draw around it.
Measure the diameter of this circle and draw another circle 10cm (4 inches) larger around it.
Cut around the outer circle.
Fold the circle in half and cut out the inner circle to create a halo shape.

9. Double the Brim
Place this halo shape onto another piece of green card and draw around it.
Cut it out so you now have two halo shapes.

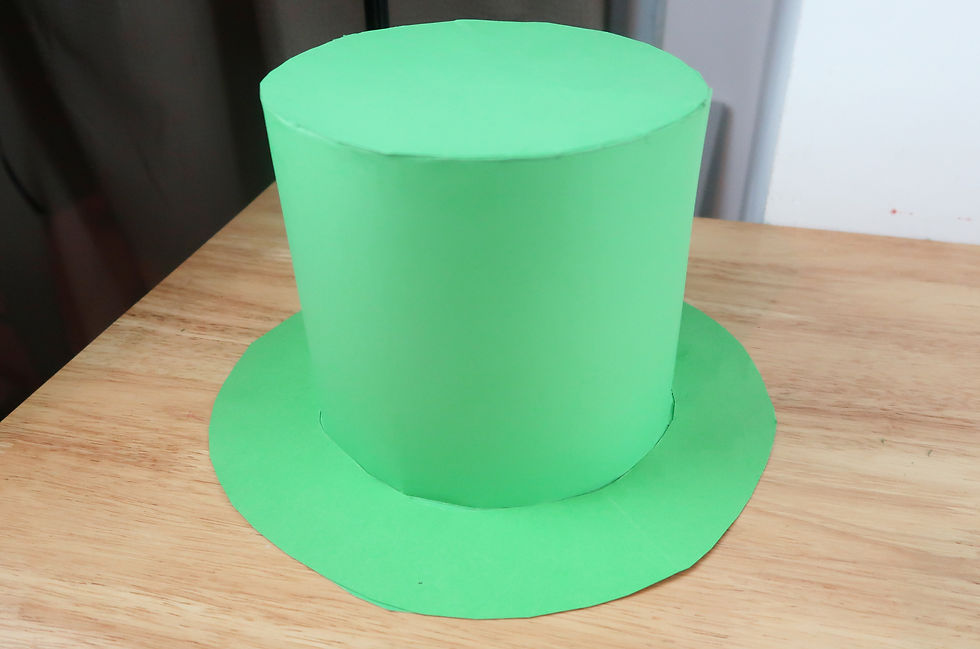
10. Attach the Brim
Add glue or tape to one halo and slide it down over the hat.
Stick it to the bottom tabs.
Turn the hat upside down and place the second halo on top of the first.
Press them together so the tabs are sandwiched between the two layers.
You should now have the full hat shape.
11. Add the Hat Band
Take your A3 black card and cut a strip 5 cm (2 inches) wide.
Wrap the strip around the hat and glue it into place.

12. Make the Buckle
Cut a rectangle from the yellow card measuring:
5 cm (2 inches) × 8cm (3 inches)
Draw a 2cm (1 inch) × 5cm (2 inch) rectangle inside it and cut it out so it forms a buckle shape.
Glue the buckle onto the black strip at the front of the hat.

Optional Decoration
For an extra festive touch, cut a shamrock from a different shade of green card and glue it onto the hat.
Your DIY Leprechaun Hat is Finished! 🍀
Your Leprechaun hat is now ready to wear.

This craft is perfect for:
St Patrick’s Day parties
School dress-up days
Irish celebrations
Craft afternoons with the kids
You could even make a whole set of hats for a St Patrick’s Day party so everyone can join in the fun.
Happy crafting


Comments